How to add new fonts in Linux Mint (Ubuntu)
Linux Mint or Ubuntu comes with many fonts pre-installed. You can open the Gnome Font Viewer to find out what are the fonts that are currently installed in your system and how they appear. Those are not sufficient for all writing, designing and other text related works. For instance a web-designer or graphic designer may need to install new fonts into their system to bring more appeal to their work. In that case, one may need to install new fonts.
These fonts, usually come into TTF (TrueType Fonts), OTF (OpenType Fonts) and WOFF(Web Open Font Format) formats.You can find many online source to download such fonts. Dafont is one such great source to download beautiful fonts. From simple writing to high quality graphic deign, this website serves with variety of fonts for all need and style. Apart from that, it’s frequently updated with fresh fonts. You may want to try it.
To add a new font in Linux Mint or Ubuntu, you first have to download the font which usually comes into zip file format. You can download it from one of the source mentioned above.
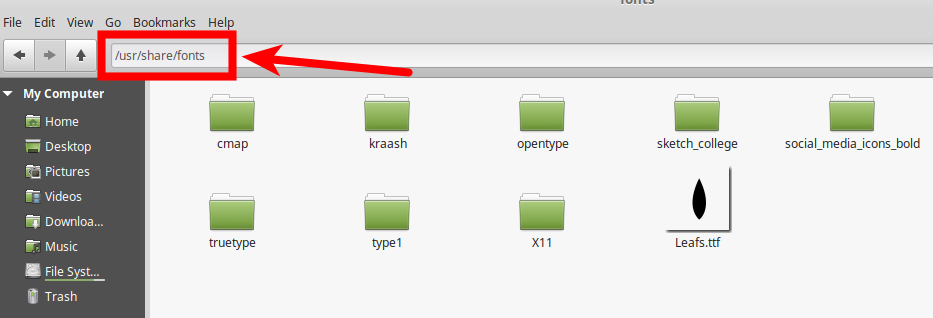
After you downloaded the zip file of any font, open the directory “/usr/share/fonts” inside System drive with root privilege (you will be asked for system password). Then extract the zipped file and save the entire extracted folder or file (TTF) into the location “/usr/share/fonts” of your System drive.
Next, you can launch the Font Viewer and look out for the font that you have recently installed in your system. You can also open the applications like GIMP, LibreOffice Writer, Inkscape, etc to check if new font is working.