A Course on Linux Command Line For Absolute Beginner

The Linux command line serves as a textual gateway to your computer, known by various monikers such as shell, terminal, console, and prompt. Despite its initial aura of complexity and befuddlement, its potential for command copying and pasting from online sources, coupled with its inherent potency and adaptability, often renders it indispensable for following online instructions, including those found on this very platform!
Embarking on this tutorial, you’ll delve into the command line’s historical backdrop before embarking on practical exercises designed to acquaint you with fundamental commands and principles. While assuming no prior knowledge, our aim is to leave you feeling more at ease the next time you encounter directives that commence with “Open a terminal.”
Linux History
In the genesis of computing, Unix emerged as an operating system tailored for formidable mainframe machines. Users engaged with these systems remotely, wielding only keyboards and screens.
These terminals acted as conduits, transmitting commands to the mainframe and presenting the outcomes in textual form. Despite their rudimentary nature, text-based interfaces proved remarkably adept, even over sluggish networks. Users navigated programs swiftly through succinct commands, a trait that endures, ensuring the continued relevance of text interfaces today.
In those early days, file management entailed command-line interactions rather than graphical interfaces. Tasks such as file creation, renaming, and relocation were all executed via textual commands.
Each task commanded its own directive, orchestrated by a “shell” program serving as the overarching coordinator. This shell facilitated seamless chaining of multiple commands and empowered users to automate tasks through “shell scripts” – basic programs executing a sequence of commands.
While the original Unix shell bore the moniker “sh,” contemporary systems predominantly adopt “bash.” Linux, Unix’s descendant, upholds its principles, ensuring compatibility with legacy Unix programs. Remarkably, one could even tether a vintage terminal to a modern Linux machine, although modern users typically favor software terminals emulating the archaic text-based interface within graphical windows.
Command Line Terminal in Linux
To unveil the terminal in Ubuntu/Linux Mint, navigate to “Activities” at the screen’s top-left corner and search for terms like “terminal,” “command,” “prompt,” or “shell.” The developers thoughtfully integrated these common terms for easy access.
For other Linux distributions or alternate Ubuntu versions, the terminal typically resides in the app repository. It may be tucked within a submenu or necessitate a search, but rest assured, it’s present.
Alternatively, most Linux systems offer a universal shortcut for terminal access: Ctrl-Alt-T.
Upon opening the terminal, you’ll encounter a modest window adorned with text at the helm. While its appearance may seem mundane, it harbors potent functionality.
Now, let’s embark on our inaugural command. Direct your cursor within the terminal window and input the following command precisely as presented:
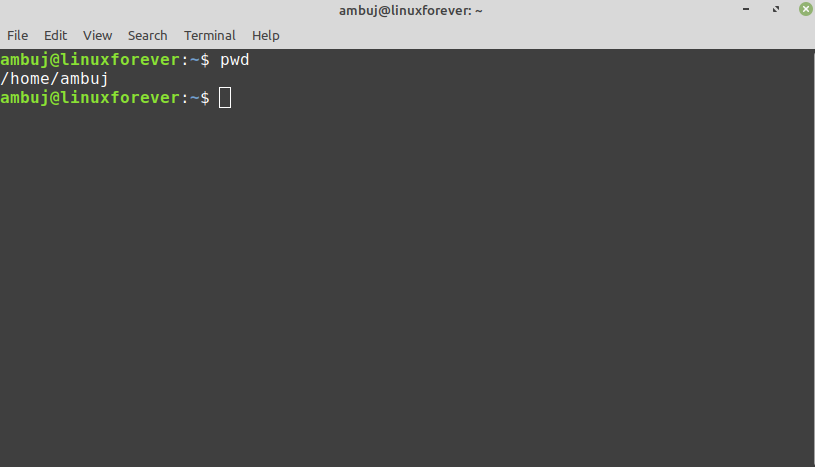
pwdThen press Enter or Return. You’ll see some text showing the current directory you’re in.
Before we go further, let’s understand a couple of basics. When you type a command, it shows up next to the text prompt, which tells you the computer is ready for a command. This prompt is also known as the “command prompt.”
When you run a command, any results it produces will appear in the terminal, and then you’ll see another prompt when it’s done.
Be careful with letter cases when typing commands. Even a small difference can cause errors.
Now, let’s talk about the “pwd” command. It stands for “print working directory” and shows you where you are in the computer’s folder system.
The computer has a default folder where it does things like create, view, or delete files. This is called the “working directory,” and it’s important to know where you are so you don’t mess up files by accident.
You can change the working directory using the “cd” command, which means “change directory.” Try these commands:
cd /
pwd
Now you’re in the root directory, which is like the main folder of the computer. In Windows, you’re probably used to seeing different drives like “C:” or “D:”. But in Linux, there’s just one big folder system, and “/” is the starting point. Be careful not to confuse the root directory with the “root” user, which is like the super boss of the computer. To go to the “home” directory, which is inside the root directory, try this:
cd home
pwd
To go up one level to the root directory again, type:
cd ..pwdTyping “cd” by itself takes you back to your home directory:
cdpwdYou can also move up multiple levels at once:
cd ../../..pwdMost of the commands we’ve used are relative, meaning they depend on where you currently are. But some, like “cd” to go home or “cd /” to go to the root directory, work no matter where you are.
Paths that start with “/” are absolute, meaning they start from the root directory. Paths that start with “~” mean they start from your home directory.
Understanding these basics will help as we move on to doing more things in the terminal.
Creating folders and files
In this part, we’re going to create some actual files to work with. To avoid messing up any of your real files, we’ll start by making a new directory in a safe place far from your main folders:
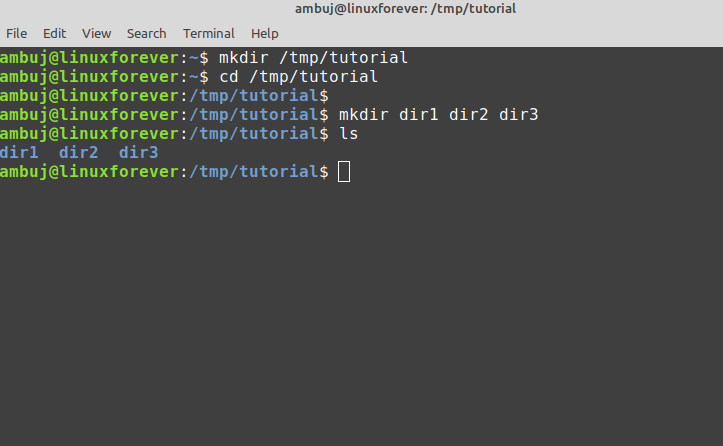
mkdir /tmp/tutorialcd /tmp/tutorialWe’re using an absolute path to ensure we create the “tutorial” directory inside “/tmp”. Without the “/” at the start, the “mkdir” command would try to make a “tutorial” directory within the current folder. If it couldn’t find a folder named “tmp,” the command would fail.
By the way, “mkdir” stands for “make directory.” Now that we’re in our testing area (double-check with “pwd” if you’re unsure), let’s create a few subdirectories:
mkdir dir1 dir2 dir3This command is a bit different. Before, we’ve only used commands on their own or with one thing after them. But this time, we’ve added three things after “mkdir.” These are called parameters or arguments. Different commands can take different numbers of arguments. “mkdir” needs at least one argument, but “cd” can work with zero or one.
Now, if you try running commands with the wrong number of parameters, like this:
mkdircd /etc ~/DesktopYou’ll see it doesn’t work right. Back to our new directories. The command above made three new subdirectories inside our folder. Let’s look at them with “ls” (list):
lsNotice that “mkdir” made all the folders in one directory. It didn’t create “dir3” inside “dir2” inside “dir1” or anything like that. But sometimes, we want to do that, and “mkdir” can do it:
mkdir -p dir4/dir5/dir6lsThis time, you’ll see only “dir4” on the list because “dir5” is inside it, and “dir6” is inside “dir5.” Later, we’ll get a tool to see this structure visually, but for now, you have enough to confirm it:
cd dir4lscd dir5lscd ../..The “-p” we used is called an option or a switch. In this case, it means “create the parent directories too.” Options change how a command works, letting one command do different things. Options can look different in different commands. You might see them as single characters with a hyphen or as longer words with two hyphens. Some commands don’t show their options clearly, so you have to know them by the order you use them. You don’t need to remember all this, just know that options exist and can look different.
Now, we know how to make multiple directories by passing them as separate arguments to “mkdir.” But what if we want a directory with a space in its name? Let’s try:
mkdir another folderlsYou probably guessed what happened: two new folders, one named “another” and the other “folder.” If you want to work with spaces in names, you have to escape them. Escaping is using special codes to tell the computer to treat certain characters differently. Try these commands to make folders with spaces in the name:
mkdir "folder 1"mkdir 'folder 2'mkdir folder\ 3mkdir "folder 4" "folder 5"mkdir -p "folder 6"/"folder 7"lsWorking with files:
Our demonstration folder has lots of directories but not many files. Let’s fix that by putting the output of a command into a new file. First, see what “ls” shows:
lsSuppose we want to save that output in a text file. We just need to add the “>” symbol to our command, followed by the file name we want:
ls > outputfile.txtNow, nothing shows up on the screen because the output went to our file. If you run “ls” on its own, you’ll see “output.txt” was made. We can use “cat” to see what’s in it:
cat outputfile.txtIt’s not exactly what we saw before, but it has the same data in a useful format. Let’s try another command, “echo”:
echo "This is a test"Echo command just prints the same thing that you give in string.
echo "This is a test" > test_1.txtecho "This is a second test" > test_2.txtecho "This is a third test" > test_3.txtls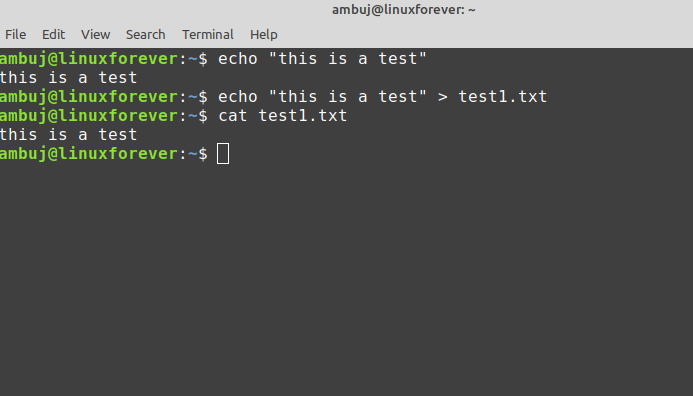
Check each file’s content with “cat.” “cat” can also combine files. If you give it more than one filename, it’ll show them one after the other:
cat test_1.txt test_2.txt test_3.txtYou can use shortcuts when typing file names. A question mark “?” means “any single character,” and an asterisk “*”
means “zero or more characters.” These are called “wildcard” characters:
cat test_1.txt test_2.txt test_3.txtcat test_?.txtcat test_*The command line can handle files and folders with spaces, but it’s a bit trickier because you have to escape them with quotes or backslashes. People who use the command line a lot tend to stick to simpler names without spaces.
If you look at the list of files with ‘ls’, you’ll see that only files or folders starting with “t” are the three test files we made. So, you can simplify the command to ‘cat t*’ which means “join all files starting with ‘t’ followed by any characters”. Let’s combine all these files into one new file called ‘merged.txt’ and then view it:
1. Combine the files: ‘cat t* > merged.txt’
2. View the combined file: ‘cat merged.txt’
Now, if we run these two commands again, the computer won’t complain because the file already exists. It will replace the existing content with the new one. If you want to add to the file instead of replacing it, you use ‘>>’ instead of ‘>’.
For example:
– ‘cat t* >> merged.txt’ appends the content of files to ‘merged.txt’.
– ‘echo “I’ve appended a line!” >> merged.txt’ adds a new line to ‘merged.txt’.
To view large files, we use a program called ‘less’:
– ‘less merged.txt’ lets you navigate through the file using arrow keys.
– Use Up Arrow, Down Arrow, Page Up, Page Down, Home, and End keys to move through the file.
– Press ‘q’ to quit ‘less’ and return to the command line.
Remember, Unix systems are case-sensitive. So, ‘A.txt’ and ‘a.txt’ are considered different files. It’s best to avoid creating files whose names only differ by case to prevent confusion and compatibility issues, especially when working with different operating systems. Most users prefer using lowercase for file names to avoid such problems.
Moving and manipulating files
Now that we have acquired several files, let’s delve into the typical day-to-day tasks you might encounter while managing them. Typically, you’d still resort to a graphical program for moving, renaming, or deleting one or two files. However, understanding how to execute these tasks via the command line proves beneficial for bulk changes or when dealing with files scattered across different directories. Moreover, you’ll gain additional insights into command-line operations along the way.
Let’s initiate by relocating our “merged.txt” file into the “dir1” directory using the “mv” (move) command:
mv merged.txt dir1To verify the task’s completion, you can employ “ls” to confirm its absence from the working directory. Then, navigate into “dir1” using “cd dir1” to ensure its presence. Subsequently, revert to the previous directory using “cd ..”. Alternatively, you can streamline this process by directly passing the path to “ls”:
ls dir1Suppose you realize that the file doesn’t belong in “dir1” after all. Instead of changing directories and then moving the file back, you can utilize path shortcuts. Similar to how “..” denotes the parent directory, “.” signifies the current working directory. Leveraging “*” matches any filename in the specified directory, minimizing keystrokes:
mv dir1/* .The “mv” command facilitates moving multiple files simultaneously. When providing more than two arguments, the last one specifies the destination directory, while the rest represent files or directories to move. Let’s move “merged.txt,” all “test_n.txt” files, and “dir3” into “dir2” using a single command:
mv merged.txt test_* dir3 dir2Now, with “merged.txt” relocated to “dir2,” suppose it belongs elsewhere, say “dir6” nested within “dir5,” which, in turn, resides in “dir4.” Utilizing path conventions, such movement poses no challenge:
mv dir2/merged.txt dir4/dir5/dir6Given the frequent usage of this file, preserving a copy in the working directory seems prudent. Analogous to how “mv” moves files, “cp” copies them:
cp dir4/dir5/dir6/merged.txt .To create another copy in the working directory with a distinct name, utilize “cp” with a new filename instead of a directory path:
cp merged.txt backup_merged.txtFor better organization, let’s rename it so it aligns beside the original in a sorted list. Since renaming operates akin to moving a file to a new name, “mv” suffices:
mv backup_merged.txt merged_bakup.txtThe same principle applies to directories, enabling the sorting of directories with spaces in their names:
mv "folder 1" folder_1mv "folder 2" folder_2mv "folder 3" folder_3mv "folder 4" folder_4mv "folder 5" folder_5mv "folder 6" folder_6Moving on to deletion, ensure you’re in the correct directory using “pwd” to prevent inadvertent deletions. Now equipped with knowledge on moving, copying, and renaming files and directories, let’s tidy up redundant copies of “merged.txt”:
rm dir4/dir5/dir6/merged.txt merged_backup.txtConsider removing excess directories as well, though note that “rm” won’t delete directories. Instead, use “rmdir” for empty directories:
rmdir folder_*However, if directories contain subdirectories, “rmdir” won’t suffice. You can opt for “rm -r” for recursive deletion:
rm -r folder_6Remember, while convenient, “rm -r” is potent and can lead to irreversible deletion. It’s prudent to delete files explicitly, navigate to the parent directory, and then remove it using “rmdir”.
More Operation with File
Let’s start with an easy question: How many lines are in your “merged.txt” file? We can find out using a command called “wc” (word count). We use the “-l” switch with “wc” to count lines. Here’s how you do it:
wc -l merged.txtSimilarly, if you want to know how many files and folders are in your home directory and then clean up, you can do this:
ls ~ > file_list.txtwc -l file_list.txtrm file_list.txtBut creating a temporary file just to delete it shortly after seems a bit much. Fortunately, there’s a shortcut called piping. It allows the output from one command to be used directly as input for another command. It’s like connecting a pipe between commands. Here’s how you can use piping to count the files and folders in your home directory without creating a temporary file:
ls ~ | wc -lNotice that no temporary file is created, and no file name is needed. Pipes work in memory, and most Unix command line tools expect to receive input from a pipe if no file is specified.
When using a pipe, the output of one command is connected to the input of the next command using the pipe character (“|”). For example:
ls /etc | wc -lThis tells us how many items are in the “/etc” directory.
If a command produces a lot of output, it’s better to use “less” to view it. You can use “less” even when using a pipe:
ls /etc | lessTo find out how many unique lines are in the “merged.txt” file, we can use the “uniq” command, which only outputs unique lines. We can chain multiple commands together using pipes:
cat merged.txt | uniq | wc -lIf you want to see the output of the command or inspect it more easily, you can use “less”:
cat merged.txt | uniq | lessIf it seems like duplicate lines are not being removed, you can check the documentation for the “uniq” command using:
man uniqThis will give you more information about how the command works.
When you use the “man” command to look up how to use a command, it’s called a “man page.” These pages are short and to the point, giving you a quick idea of how a command works rather than teaching you everything about it. They’re technical but you can usually skip most of it and just find what you need.
For example, if you look at the “uniq” command’s man page, you’ll find a short description of what it does, followed by how to use it and details about its options. But sometimes, man pages can be hard to understand. They’re best when you just need a quick reminder of something specific about a command.
For “uniq,” its man page explains why duplicate lines aren’t removed: it only works on lines that are next to each other.
So, to fix this, we need to rearrange our file so that duplicate lines are next to each other. We can do this by sorting the file alphabetically using the “sort” command. The “sort” command rearranges lines in a file.
sort merged.txt | lessNow, if you check the file, you’ll see the lines are in alphabetical order, which makes it perfect for using with “uniq.” Finally, we can count the unique lines in the file:
sort merged.txt | uniq | wc -lThis ability to chain commands together using pipes is really useful. It lets you manipulate your data without creating temporary files or typing a lot. You’ll see it used a lot in command lines. Even though long chains of commands might look complicated, you can break them down into smaller parts and understand them better by looking at each command’s man page.
Understanding use of superuser in Linux terminal
The superuser is like a user with superpowers. In the past, it was an actual user with a specific username, often “root,” that you could log in as if you had the password. The superuser can do a lot of powerful things. For example, they can change or delete any file on the system, no matter who owns them. They can also change firewall rules or start network services that might make the computer vulnerable to attacks. Additionally, the superuser can shut down the computer, even if other people are still using it. In simple terms, the superuser has almost unlimited control and can bypass many of the usual restrictions put in place to keep users from doing too much.
When someone is logged in as the root user, they can still make mistakes, just like anyone else. To reduce these mistakes, many Linux systems began promoting the use of the “su” command. This command can stand for either “superuser” or “switch user.” It allows you to switch to a different user on the computer without needing to log out and back in again.
When you use “su” with no specific user mentioned, it assumes you want to switch to the root user, hence the first interpretation of its name. However, you can also pass a username to it to switch to a particular user account, which reflects the second interpretation.
The idea behind encouraging the use of “su” was to urge administrators to spend most of their time using a regular account. They should only switch to the superuser account when necessary and then promptly return to their regular account using the logout command or Ctrl-D shortcut.
“sudo” is another command used to run a command with superuser privileges. A configuration file is used to determine which users can use “sudo” and which commands they can run with it. When a user runs a command with “sudo,” they are prompted for their own password, which is then stored for a certain period (usually 15 minutes). This means they won’t be repeatedly asked for their password if they need to run multiple superuser-level commands within that time frame.
Hidden files in Linux
Before we wrap up, let’s discuss hidden files and folders. On Linux systems, these are used to store settings and configurations, but they’re hidden to keep things neat. What makes them hidden is that their names start with a dot (“.”).
For example, suppose we’re in a directory called “/tmp/tutorial” and we have a file named “merged.txt”. We can hide it by renaming it to “.merged.txt” using the bash command:
cd /tmp/tutorialmv merged.txt .merged.txtTo still work with the hidden file, we need to include the dot when specifying its name, like this:
cat .merged.txtNow, if we create a directory called “.hidden” and move our hidden file into it, the directory will also be hidden. We can still see its contents by using the bash command:
mkdir .hiddenmv .merged.txt .hiddenls .hiddenTo see all hidden files and folders in a directory, we use the “-a” switch with the “ls” command:
ls -als -a .hiddenWhen we’re done, we can clean up by removing the experimental area we were using with the bash command:
rm -r /tmp/tutorialls /tmpFinally, to close the terminal, we can either use the “logout” command or the Ctrl-D shortcut. It’s good practice to tidy up after ourselves and leave the computer in the same state we found it.